


Pin Curl Basics for a 1940s or 1950s Hairstyle
By Guest Blogger Lauren Rennells from vintagehairstyling.com

About Lauren Rennells
 Lauren is an American hairstylist, makeup artist, writer, and lover of retro beauty. Her amazing books and styling tools have made retro styling a breeze for women all over the world. We're so thrilled she took the time to write this tutorial for us. Thanks, Lauren!
Pin Curl Basics
There are hundreds of resources today with directions on recreating retro beauty we all love so much. The style and techniques used vary widely. Everyone has their own tools and tricks to achieve their results.
Using modern tools and techniques to style these vintage hairstyles may get a slightly different look from those old glamorous images of women in the early 20th Century. It is a subtle thing, but like in the image below from 1942, there is something different. The biggest difference can often be narrowed down to one element…the pin curl.
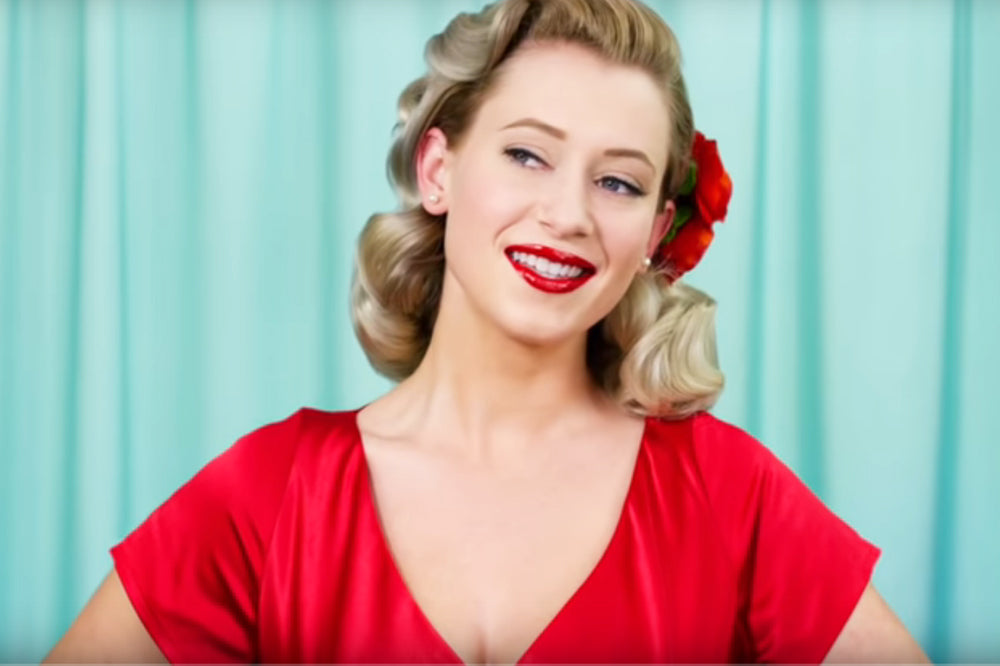
The 1940s and 1950s saw a significant number of women utilizing pin curls for their main curling technique. Its beginnings are rooted in the water-waving techniques popular during the 1920s. More commonly referred to today as finger waving, water-waving created beautiful close-fitting waves.
Fuller hairstyles gained popularity by the middle of the 1930s and pin curls fit the bill for creating a combination of the waves women still loved, but with a softer, fuller silhouette. A staple well into the 1950s, the simple pin curl helped create most of the curls.
How do you do it?
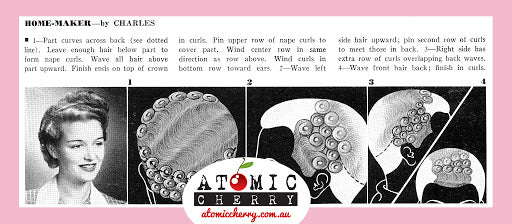
Where the pin curl becomes more complicated and offers the diversity of hairstyles that spanned so many years is in the direction and size of them.
The basic pin curl steps are laid out below and also in my Primrose Pin Curl Set video at the end of the article. You can also find more details on the pin curl’s diverse options in my book Vintage Hairstyling: Retro Styles with Step-by-Step Techniques.
Here are the basic steps for creating a pin curl. Even the simplest pin curl creates a beautiful retro look that lasts.
To start, you need to prep your hair with the correct products. For the best results, your hair should be damp. The water acts like a styling product if you can believe it. The amount of water depends on the hair type. Finer hair can be wetter and may require more water for hold. To avoid excessive drying time, thick hair should be towel dry damp.
You will also need a curl setting or shaping lotion. Miss Curlette Hair Setting Potion is a great one for curl wet sets. The best lotions will make your hair a little sticky which makes it easier to control the ends and roll the hair into the curl.
All of your styling products, (the water, the setting lotion, whatever you are using) should be distributed evenly through the hair. Also, if a section of hair is too dry or too wet, the results will be uneven. The finished hairstyle will look better with more even product distribution.
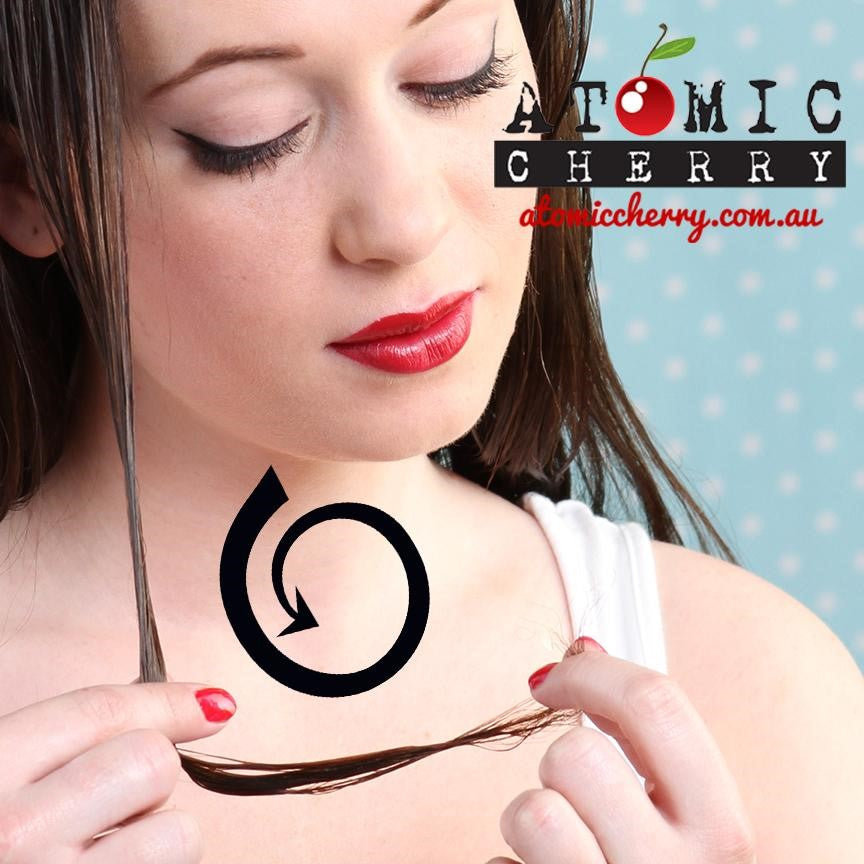
Step 1
Prep your hair with the curl setting potion and separate out a 1 by 1 inch section of hair and comb it smooth.
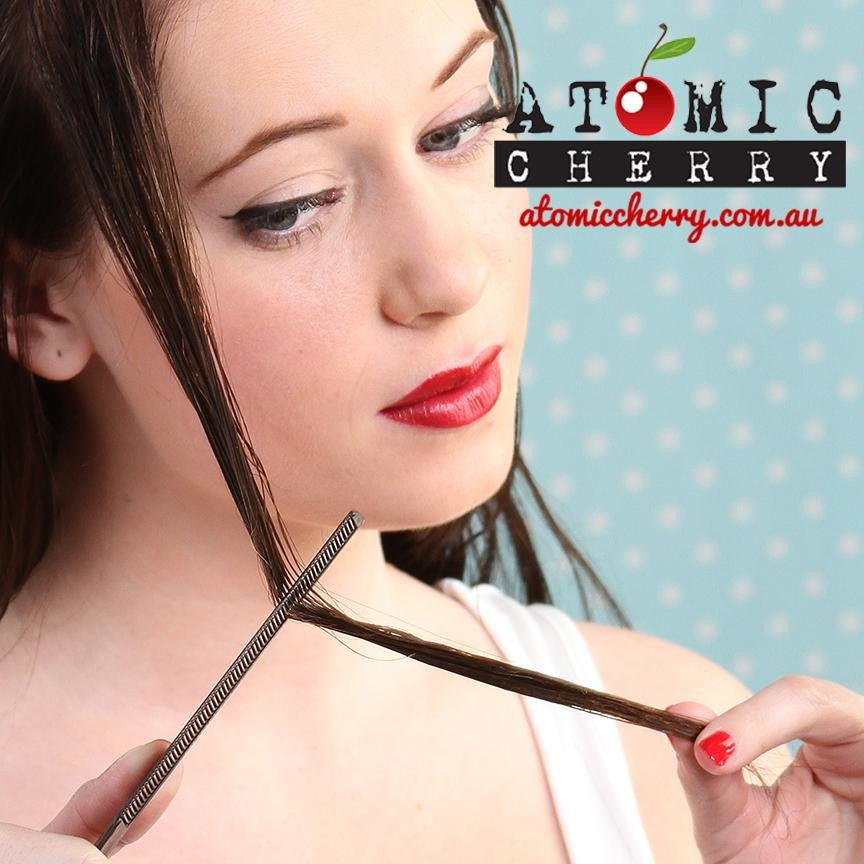
Step 2
Begin the curl at the end of the hair section by wrapping the end toward the hair shaft. You can use your fingers to create the curl but to make it easier, the Roll and Go Hair Tool or Sculpture Pin Curl Tool are perfect for creating quick pin curls.

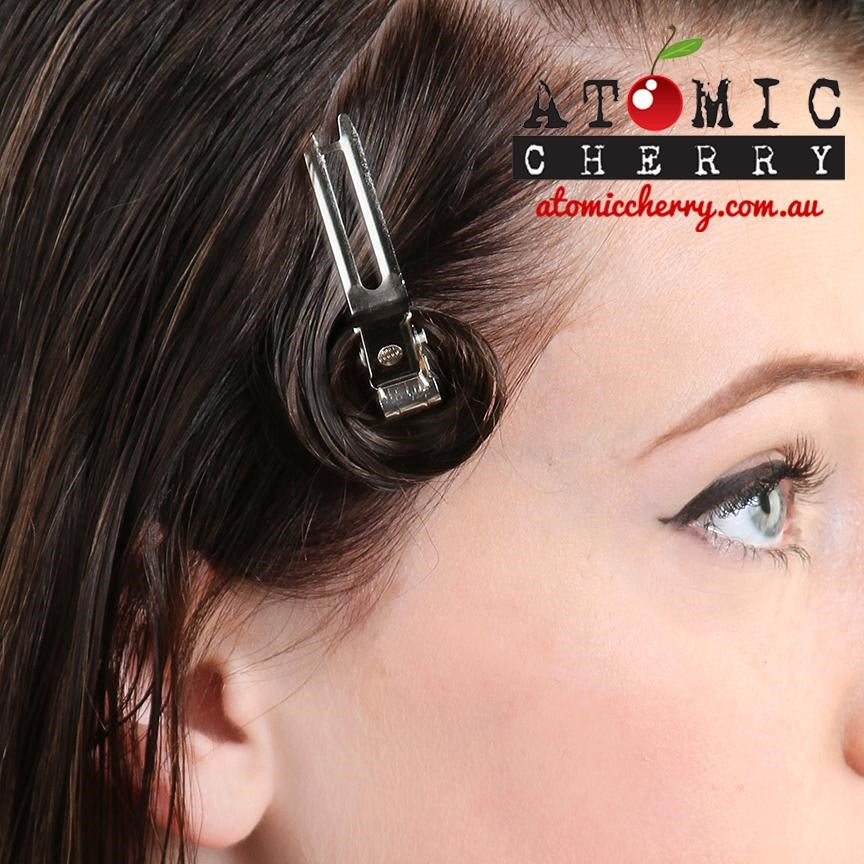
Step 3
Once the section has been curled to the scalp, clip or pin the curl flat against your head with a pin curl clip. Try the Starlett Single Prong Clips for fine hair or the Lady Eliza Double Prong Clips for thicker or longer hair.
Step 4
Allow your hair to air dry or use a hooded hair dryer to dry the curls thoroughly. When completely dried, the curls can be brushed out. Please note: If the curl is not completely dry, brushing it will pull the curl out of your hair.
Primrose Pin Curl Set Video
My tutorial video for the Primrose pin curl set is just over 10 minutes long and illustrates a great basic wet set. This pin curl set looks amazing on many different hair lengths from medium length to long hair.
The curl setting pattern is called a skip wave with alternating pin curl directions that result in a gorgeous vintage 1940s/1950s wave when styled. The video also includes tips on the part of the pin curl set many people have trouble with…the brush out!


Leave a comment